This page explains how to create Sales, record payments, print or share receipts, and review transaction history.
Create a Sale
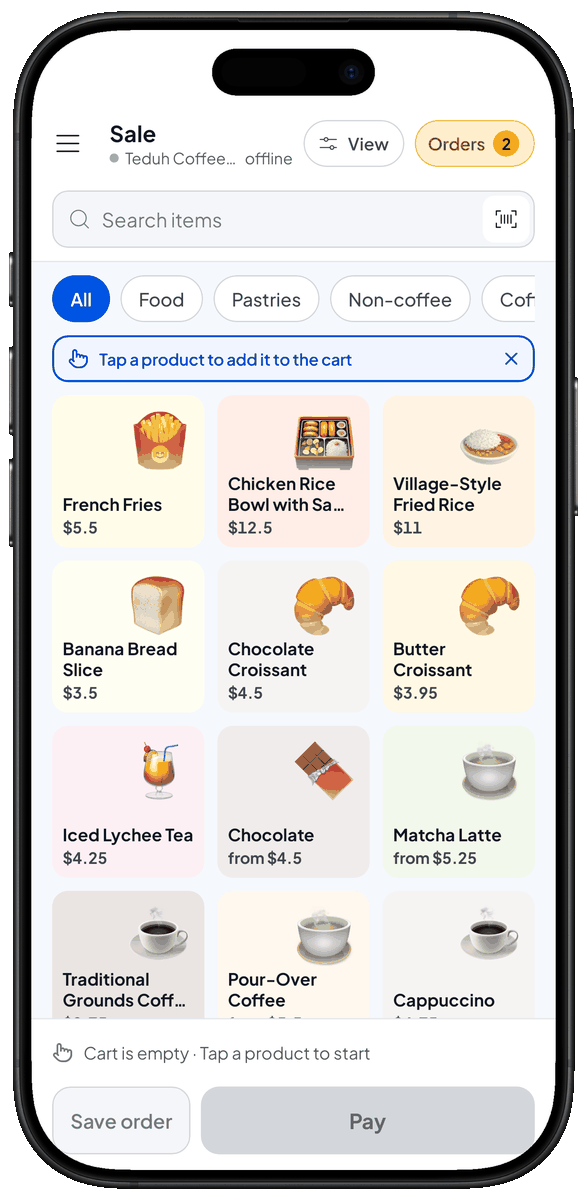
- Open the Sale screen.
- Add items to the sale:
- Search by name, SKU, or scan a barcode.
- Enter the quantity (and choose a variant if applicable).
- Tap the Bag icon button (price summary) to open the sale summary.
- In the summary you can:
- Select or create a Customer (optional).
- Edit line items (change quantity, or remove an item).
- Add fees and deductions for the sale.
- Add notes for this sale.
- Choose payment method:
- Cash — enter the amount received; the app can calculate change.
- Other Payment Method — or use other payment method you have.
- Complete the sale. The sale is saved in transactions history and a receipt is generated.
The receipt window after a sale
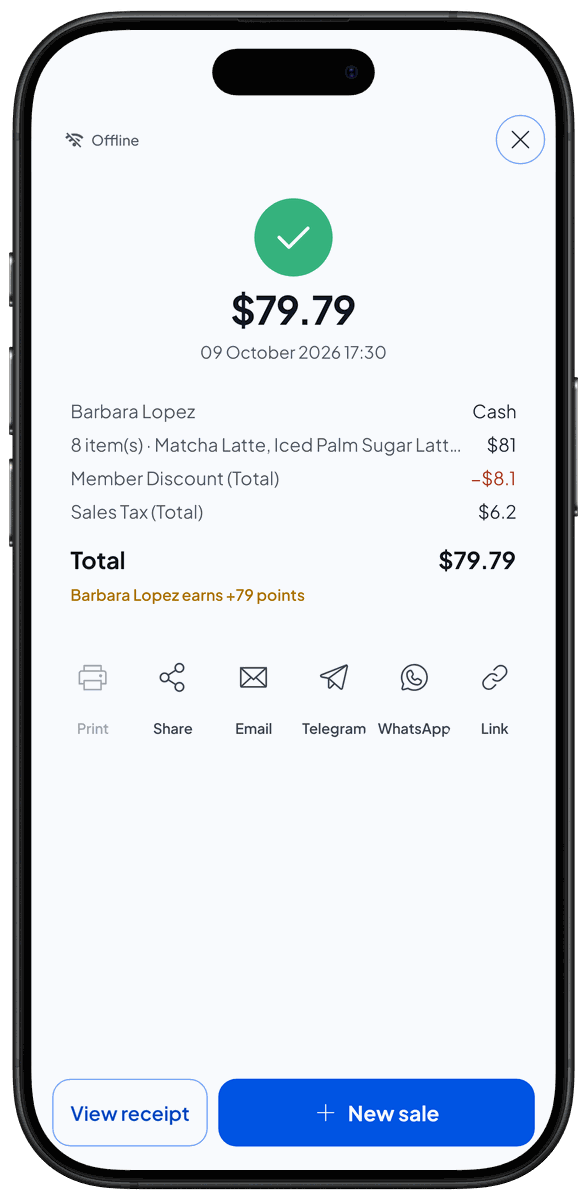
When you complete a sale, the receipt window opens with the total and a summary of the sale. Choose how to give the receipt:
- Print: prints the receipt. The button is active when a Bluetooth or USB thermal printer is connected.
- Share: shares the receipt as an image to another app.
- Email: emails the receipt to the customer selected for this sale.
- Telegram and WhatsApp: send the receipt through that app.
- Link: shares a link to the web receipt.
Tap View receipt to see the receipt, or New sale to serve the next customer.
Fees
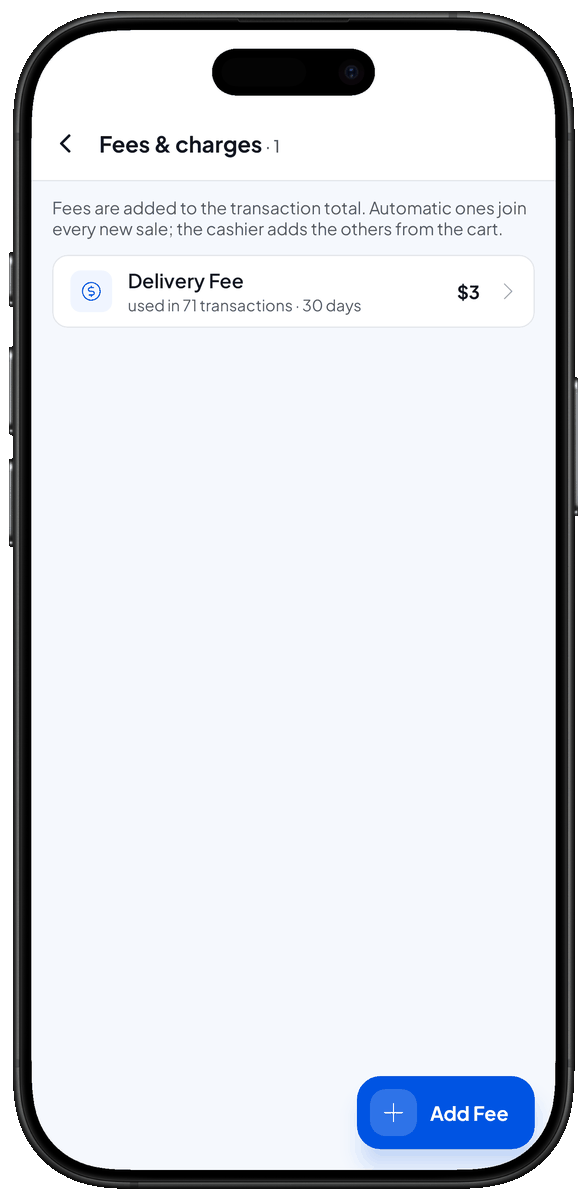
- Fees are additional charges applied to the whole sale (for example: service charge, delivery fee, packaging fee).
- Fees behave like taxes at the sale level: they can be a percentage or a fixed amount depending on your configuration.
- You can create, edit, or delete fee items in Catalog > Fees. Once configured, select one or more fees when completing a sale.
- Multiple fees may be applied to the same sale (they stack), and you can modify or remove them in the sale summary before completing the sale.
Deductions
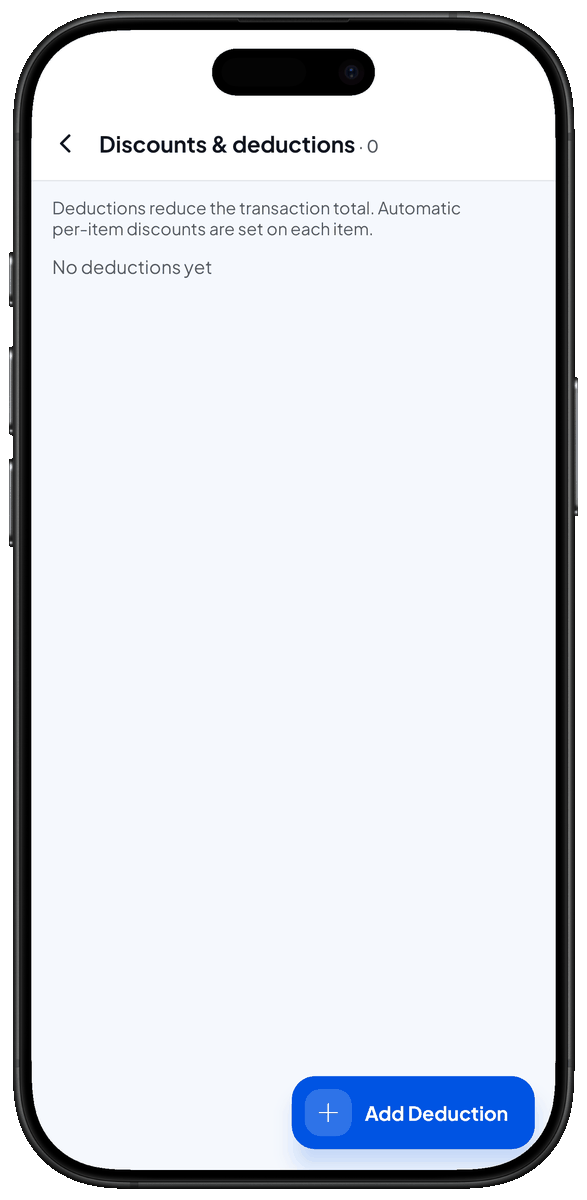
- Deductions are sale-level discounts (for example: order-level discount, promotional deduction).
- Deductions work like item discounts but apply to the whole sale. They can be a percentage or a fixed amount.
- You can create, edit, or delete deduction options in Catalog > Deductions. After creating them, select one or more deductions in the sale summary.
- Multiple deductions may be applied; the system will apply them in the order you select (confirm behavior in your app settings).
Tips and best practices
- For high-volume environments, use barcode scanning to speed checkout.
Related pages
- Transactions - history of sale you have made.
- Customers - manage your customers
- Payment Methods
- Items - manage your items for sale