This guide explains how to add and edit items (products or services) in Salesmaster, including the tax and discount for each item.
Add an item
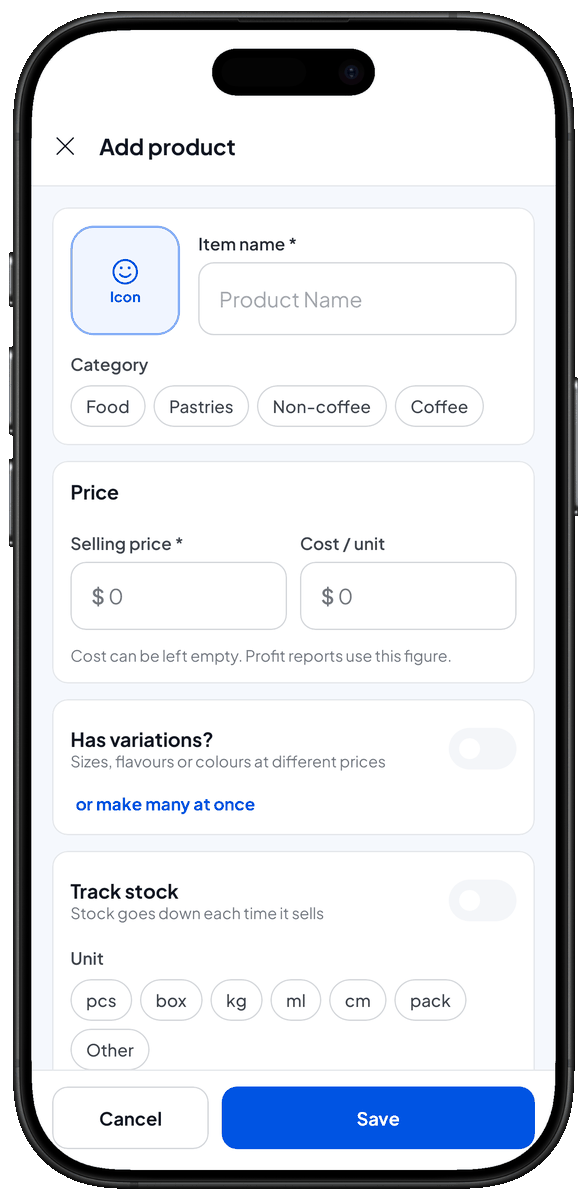
- Open Catalog > List Items. The item list opens.
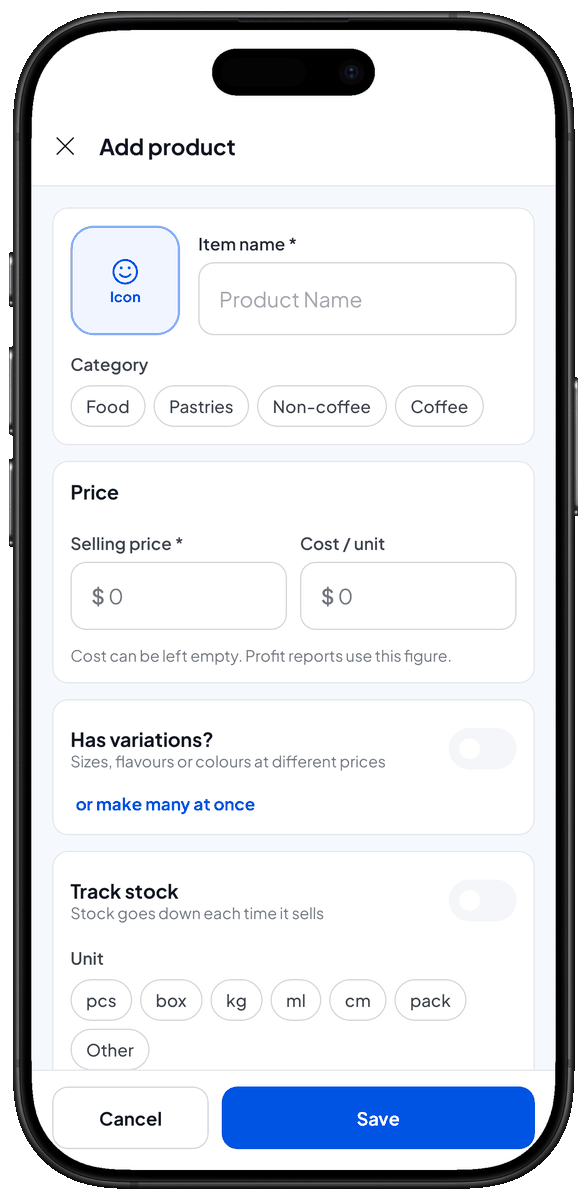
- Tap Add item. The app asks what kind of item it is.
- Choose Product (finished goods with stock counted) or Service (work you do, no stock). The Add product or Add service form opens. If the Ingredients feature is on, there is also a made-to-order option.
- Tap the Item look tile to choose a photo, icon, emoji or short text (optional). This is what the cashier sees on the Sale screen.
- Enter the Item name.
- Pick a Category, or tap + Category to create a new one (optional).
- Enter the Selling price.
- Enter the Cost / unit and Unit (optional). The cost is used to work out profit in reports.
- Turn on Track stock if you want stock to go down each time it sells, then enter the Starting stock (optional).
- In the Other section, enter a Barcode and set the Tax and Discount if you need them (optional). How to do that is under Tax per item and Discount per item below.
- Leave On sale on so the item shows at the cashier.
- Tap Save. The new item appears in List Items, ready to sell.
Edit an item
- Open Catalog > List Items and tap the item you want to change. The Item details screen opens.
- Tap Edit. The item form opens.
- Change what you need and tap Save. Your changes are saved.
To delete an item, open its form and tap Delete Item at the bottom. Sales history and reports stay safe.
Item variations
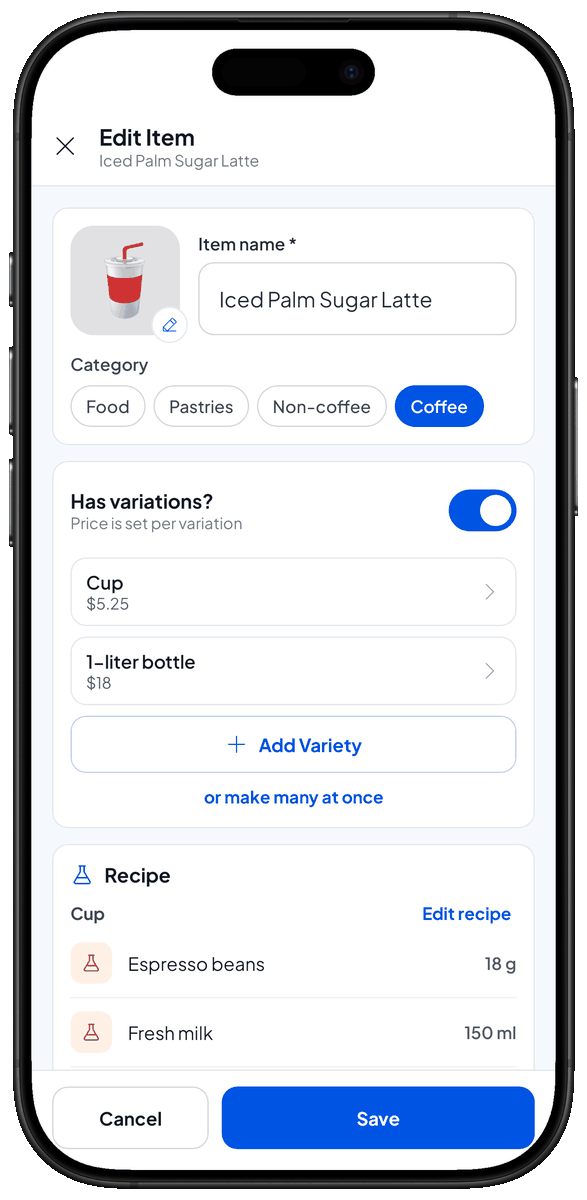
Use variations when one product comes in sizes, flavours or colours at different prices. Each variation has its own price, cost, barcode and stock.
- In the item form, turn on Has variations?. The price is now set per variation.
- Tap Add Variety. The variation form opens.
- Enter the Variation name and Selling price, then the Cost, Barcode and Starting stock if you need them.
- Tap Save variation, or Save & next to add the next variation straight away. The variation appears in the item's variation list.
To make many variations at once (for example Size × Temperature), tap or make many at once, fill in the options and the base price, then tap the Create … variations button (the number matches how many will be made).
Tax per item
The tax per item is added on top of the price at checkout, for example VAT or restaurant tax. Each item uses one tax.
- In the item form, scroll to the Other section and tap Tax. The Tax sheet opens with your existing taxes and a No tax option.
- Pick the right tax. The example below it shows what the customer pays.
- Tap Use tax. The Tax row in the form shows the tax's name and rate.
If the tax doesn't exist yet:
- On the Tax sheet, tap Create a new tax. The New tax sheet opens.
- Enter the Tax Name, for example "VAT", or tap one of the suggested names.
- Choose Percent rate (a percentage of the price) or Fixed rate (a set amount per item), then enter the rate. A percentage must be between 0 and 100.
- Tap Save & use. The tax is saved and used for this item straight away.
A tax you create can be picked for other items too. Its rate can't be changed. If the rate changes, create a new tax.
Discount per item
The discount per item is taken off automatically each time the item sells, for example for a happy hour promo. Each item uses one discount.
- In the item form, scroll to the Other section and tap Discount. The Discount sheet opens with your existing discounts and a No discount option.
- Pick the right discount. The example below it shows the Price after discount.
- Tap Use discount. The Discount row in the form shows the discount's name and amount.
If the discount doesn't exist yet:
- On the Discount sheet, tap Create a new discount. The New discount sheet opens.
- Enter the Discount Name, for example "Payday promo".
- Choose Percent rate or Fixed rate, then enter the amount.
- Tap Save & use. The discount is saved and used for this item straight away.
The discount comes off the price before tax is worked out. A discount you create can be picked for other items too.
To stop a discount or tax on an item, open the item form, tap Discount or Tax, choose No discount or No tax, then save the item.
The discount and tax here apply per item. For a cut on the whole transaction (for example a member discount), create a Deduction in Catalog > Discounts & deductions and pick it in the sale summary. See Create a sale.
Categories
- Categories keep your catalog tidy and help the cashier find items, for example Drinks, Food, Accessories.
- Pick a category in the item form, or tap + Category to create a new one.
- Manage all categories in Catalog > Categories.
Once the item is saved, sell it once on the Sale screen to check that the price, tax, discount and variations are right.
Related pages
- Stock tracking — manage the item's stock.
- Create a sale — sell the items you've made.